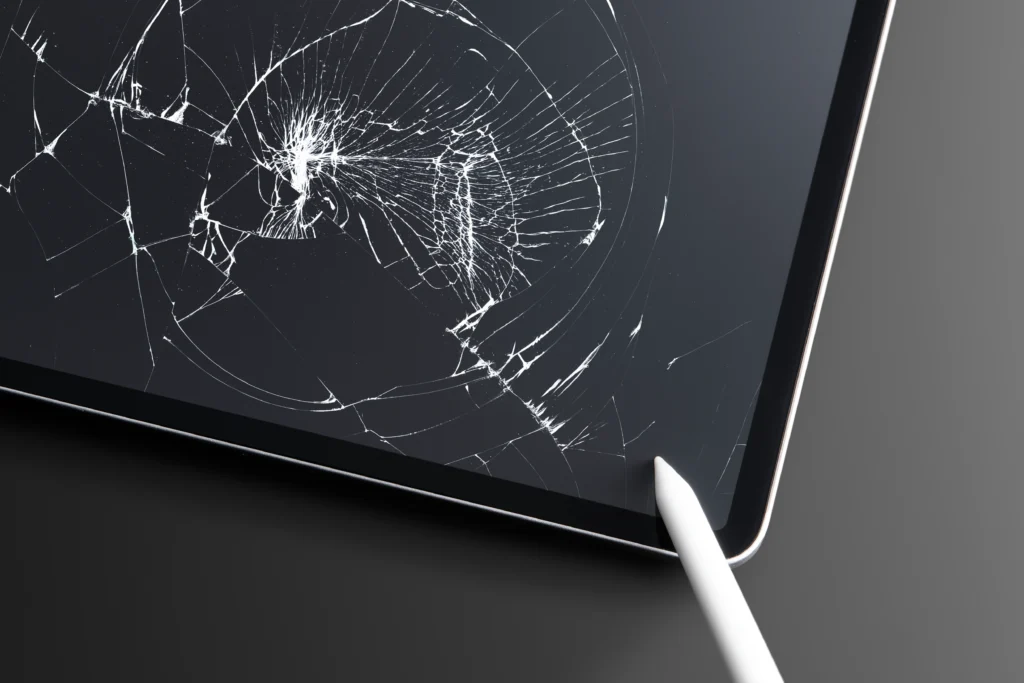
Is your laptop screen cracked? You’re not alone—every year, thousands of people in the U.S. face this frustrating issue. Whether it was a mishap during a hectic day at work or an accidental drop, a cracked laptop screen can be a serious inconvenience. But what if you could fix it yourself?
In this ultimate guide, we’ll walk you through the process of repairing a cracked laptop screen yourself—safely, effectively, and without the high repair costs. From gathering tools to step-by-step instructions, this blog will ensure you have all the information you need to restore your laptop’s display to its former glory.
What You Will Learn:
- How to assess the damage to your laptop screen
- Step-by-step instructions to fix a cracked laptop screen yourself
- When you should consider replacing the screen instead of fixing it
- Tips and tricks from experts for a seamless repair process
Why Should You Repair Your Cracked Laptop Screen?
Is It Worth Repairing Your Laptop Screen Yourself?
Many people hesitate to repair their laptop screen themselves because they fear it will be too complicated or time-consuming. However, repairing a cracked laptop screen can be a cost-effective solution. In fact, a study from Consumer Reports revealed that DIY repairs for laptop screens can save up to 50% compared to professional repair services. If you’re comfortable with some basic tools and following a clear guide, repairing your laptop screen can be an empowering experience.
When to Consider DIY Screen Repair
Before diving into the DIY repair process, it’s essential to determine if it’s feasible for you. If your laptop is under warranty, it’s advisable to check the warranty terms—attempting to repair it yourself may void your warranty. Additionally, if the screen is completely shattered or has other internal damage, a professional repair may be necessary. However, minor cracks, scratches, or small black spots can typically be handled by DIY repair methods.
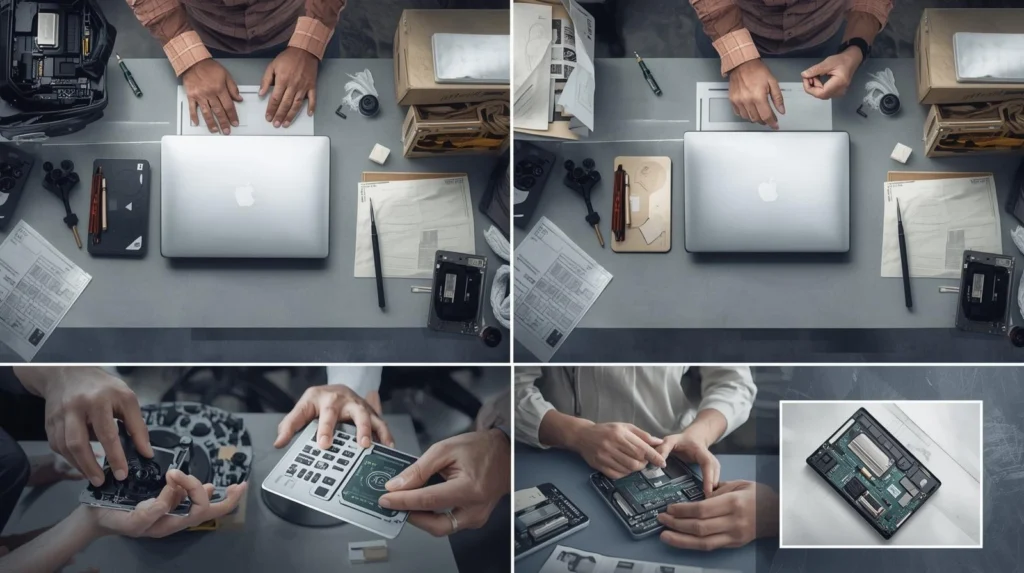
Step-by-Step Guide to Repairing Your Cracked Laptop Screen
What Tools Do You Need for the Repair?
Before starting, make sure you have the right tools. Here’s a list of what you’ll need:
- Replacement screen: Make sure to order the right screen for your laptop model. You can find these online or through local electronics stores.
- Small screwdriver set: A set of precision screwdrivers is necessary to open your laptop’s casing.
- Plastic pry tools: These tools will help you gently open the laptop without damaging the casing or screen.
- Anti-static wrist strap: To prevent static electricity from damaging the internal components of your laptop.
- Pry bar or suction cup: For lifting the cracked screen off the body.
How to Remove the Cracked Screen
- Turn off your laptop and unplug it: Before you begin, ensure that your laptop is powered off and unplugged. Remove the battery as well if possible.
- Set up a clean workspace: Ensure your workspace is clean and free of any potential debris or liquids. Lay down a soft cloth or mat to prevent damaging the screen or other parts of your laptop.
- Remove the screws: Use the small screwdriver set to remove any screws around the edges of the screen bezel. Be sure to keep them in a safe place, as you will need them to secure the new screen.
- Gently detach the screen bezel: Use the plastic pry tool to gently lift the bezel (the outer frame) of the screen. This can sometimes be tricky, so take your time and be gentle to avoid damaging the screen or the casing.
- Disconnect the broken screen: After removing the bezel, you’ll see the screen’s connection to the motherboard. Carefully disconnect the cable connecting the screen to the motherboard. This is often a small, flat cable that can be carefully unclipped or unscrewed.
- Remove the broken screen: Once disconnected, carefully remove the broken screen. If it’s stuck, use a suction cup or pry bar to help lift it.
Installing the New Screen
- Align the new screen: Place your new screen carefully in the same position as the old one, aligning the screw holes and connectors properly.
- Reconnect the display cable: Once aligned, reconnect the cable that connects the screen to the motherboard. Be sure to press it in gently but firmly to ensure a proper connection.
- Reassemble the laptop: Secure the new screen by carefully screwing it back into place. Once the screen is secure, snap the bezel back into position.
- Test the new screen: Power on your laptop and check if the new screen works. You should see a clear display with no dead pixels or lines.
When Should You Consider Professional Help?
While DIY repairs can save you money, there are some instances when professional help is the best option:
- Severe damage: If the screen is severely cracked or shattered, a DIY repair may not be possible.
- Internal damage: Sometimes, the laptop’s motherboard or other internal components may be damaged along with the screen. This is a more complex issue and requires professional intervention.
- Lack of time or expertise: If you’re not comfortable with disassembling your laptop or lack the time, hiring a professional technician might be a better option.
Pro Tips for a Successful DIY Laptop Screen Repair
1. Be patient and gentle: Laptop parts are delicate. Rushing the process or applying too much pressure can lead to further damage.
2. Check the warranty: Before performing any repairs, check your laptop’s warranty terms to ensure DIY repairs won’t void it.
3. Take photos: Before disassembling your laptop, take pictures of the connections and how the screen is secured. This will help you reassemble it correctly.
Conclusion
Repairing a cracked laptop screen is not as difficult as it may seem. With the right tools, patience, and following a clear guide, you can replace the cracked screen yourself and save money. However, always weigh the complexity of the damage against your technical skills before deciding on a DIY solution.
If you’re ever unsure or uncomfortable with the repair process, it’s always best to consult with a professional technician. With the right approach, though, your laptop can look as good as new in no time.
Next Steps:
- If you’re planning to replace the screen, start by checking out your laptop model’s specific screen replacement guide.
- Check out our other articles on laptop maintenance to keep your device running smoothly.
Frequently Asked Questions (FAQ)
1. Can I repair a cracked laptop screen myself?
Yes, if the damage is minor and you have the proper tools, you can repair a cracked laptop screen yourself. Follow a detailed guide, and make sure to handle the components gently.
2. How much does it cost to replace a laptop screen?
Replacing a laptop screen yourself can cost anywhere from $50 to $150 depending on your laptop model. Professional repairs may cost more, including labor fees.
3. How do I know which replacement screen to buy?
Check your laptop’s model number and ensure the replacement screen is compatible. You can often find this information online or in the laptop’s manual.
4. What if my laptop screen has a black spot but isn’t cracked?
A black spot could indicate a problem with the display panel. If the issue persists, it may need to be replaced. In some cases, minor dead pixels can be fixed with software, but a full replacement is often necessary.
5. Will repairing my laptop screen void my warranty?
It depends on the warranty terms. Some manufacturers void the warranty if you attempt a DIY repair, so always check the terms before proceeding.